
Underground line work looks like a digging job from the curb. Most of the real decisions happen before anyone touches the soil, though. A careful plumber treats your water service and your sewer lateral as two separate systems. Each one fails in its own way, faces its own code test, and changes ownership somewhere along its length. The water line is pressurized, so it fails by leaking, narrowing or freezing. The sewer lateral runs on gravity, so it fails by sagging, cracking or filling with roots.
In south central Wisconsin, depth adds another layer of planning. During the brutal 2014 winter, Madison Water Utility reported the frost line plunging to six feet in some areas, along with a backlog of frozen service laterals. A normal winter brings fewer than five such calls. The utility also noted that maintaining the lateral is generally the homeowner’s job. That is why water services here are buried deep, and why any repair has to put the pipe back below frost, not wherever digging happened to be easiest.
Housing age shapes the rest of the job. According to the City of Madison Water Utility’s lead service line replacement records, the city replaced more than 8,000 lead service lines between 2000 and 2012, making it one of the first major U.S. cities to complete such an extensive program. Although no known lead service lines remained in its inventory as of November 2025, older properties may still contain aging plumbing materials. In established neighborhoods, galvanized steel water pipes and clay tile or cast iron drains can present corrosion, root intrusion, and structural deterioration problems. The U.S. Environmental Protection Agency’s research on lead contamination in Madison homes also highlights why older interior plumbing deserves attention even after municipal service lines have been replaced. Beyond pipe age, Dane County’s glacial deposits, clay-rich soils, and groundwater conditions near the lakes can complicate excavation, trench stability, and soil settlement after underground plumbing repairs.
For homeowners across Madison and the surrounding Dane County communities, 4 Lakes Plumbing handles this pairing of jobs through its Main Water Line Replacement and Sanitary Drain & Sewer Lines services. The team has worked on local homes and businesses since 1995. That history means familiarity with the frost depths, older pipe materials and connection points these projects involve. If your water pressure has faded, a floor drain gurgles after laundry day, or you bought an older house with no record of what’s buried out front, request a line inspection before a small defect becomes an emergency dig in January.
Phase One: Locating Everything Before Digging
- File the locate request. State law requires contacting Diggers Hotline at least three working days before excavating, and weekends and holidays don’t count. The Diggers Hotline excavator’s guide lays out start dates, emergency tickets and relocate rules. Once the marks are down, the crew has ten calendar days to begin work before it needs a fresh location.
- Trace what the hotline won’t mark. Facilities that sit entirely on private land often go unmarked. That includes your own water service, sewer lateral, a detached garage feed and irrigation lines. The plumber traces these separately with an electronic locator.
- Confirm the shutoffs. The crew checks that the curb stop turns, so water can be cut at the property line. A seized curb stop means coordinating with the water utility before anything else happens.
- Flag the hand-dig zones. Within 18 inches of marked gas or electric lines, machines give way to hand tools or vacuum excavation.
Phase Two: Putting a Camera Down the Sewer
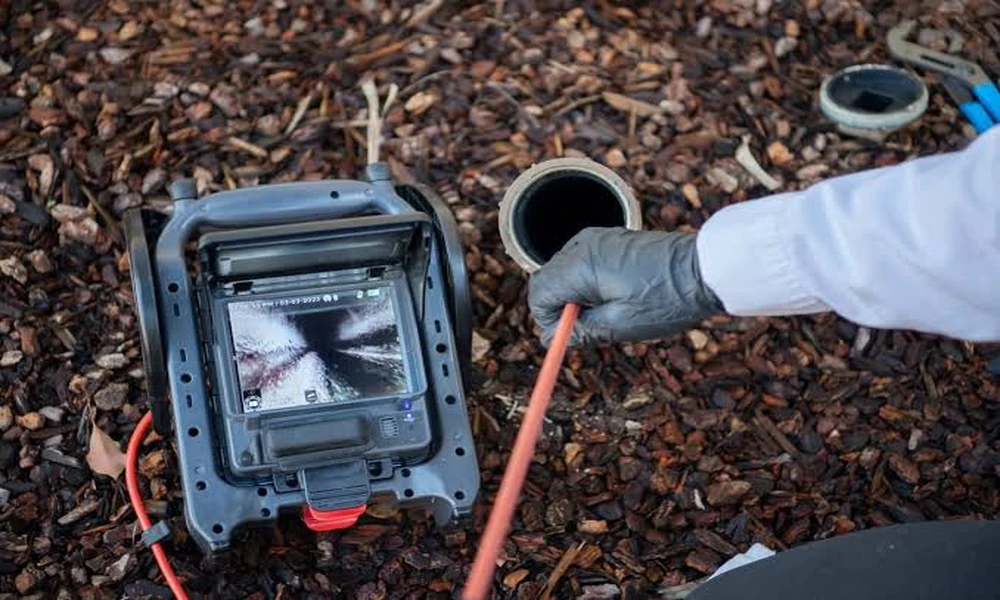
- Open a clean access point. This is usually the main cleanout in the basement or an exterior cleanout near the foundation.
- Record the full run. The camera footage carries a distance counter, so each defect gets logged by its footage from the access point. Typical findings include roots at joints, offset joints, cracks, standing water in a belly, and crushed sections.
- Map it from above. A transmitter in the camera head lets a locator on the lawn pin each defect’s position and depth. Those spots get spray-painted on the grass.
- Separate private from public. The crew notes where the lateral meets the city main. Work at that connection, or in the street, usually brings separate permits and municipal coordination.
Phase Three: Reading the Water Service
- Identify the material at the wall. A magnet sticks to galvanized steel but not to copper. A light scratch reveals copper’s color.
- Test flow, not just pressure. Corroded galvanized pipe narrows from the inside. Static pressure can read fine while the flow collapses as soon as two fixtures run at once.
- Check for hidden leaks. With every fixture off, the meter’s leak indicator should stay still.
- Ask about freeze history. A service that has frozen before probably sits too shallow. That points toward replacing the line at proper depth rather than patching it.
Phase Four: Choosing Trench or Trenchless
- Cured-in-place lining suits a sewer that still holds its shape. It cannot fix a belly, though, because the liner follows the sag.
- Pipe bursting pulls new pipe through the old path while fracturing the old pipe outward. It works for both water services and laterals. It needs an entry pit and an exit pit, and it struggles with sharp bends or fully collapsed runs.
- Directional boring drills a fresh path for a water service. It makes it easy to hold depth below frost along the whole length.
- Open trench wins when the grade is wrong, when the pipe has collapsed in several places, or when connections need rebuilding. Clay walls often stand on their own. Sandy or saturated soil near the lakes needs shoring. OSHA requires protective systems in trenches five feet or deeper, which covers most local water services.
- Weigh the season. Frozen ground slows excavation and raises costs, so scheduling becomes part of the decision.
Phase Five: Testing Before Anything Gets Buried
Wisconsin’s plumbing code, SPS 382.21, sets the testing rules. A water service has to prove watertight under a test pressure at least equal to its working pressure, using potable water. A building sewer is plugged where it meets the public sewer and filled to a ten-foot head of water.
- Pressure test the water service and watch the gauge for any drop.
- Hold the sewer test. The state’s testing affidavit lists 15 minutes for both the water test and the alternative low-pressure air test.
- Schedule inspection before cover wherever the municipality requires it.
- Flush the new water line before turning the house back on.
Phase Six: Backfill and Restoration
- Bed the pipe in sand or fine material so no rock rests against it.
- Backfill in compacted lifts rather than dumping the spoil back in all at once.
- Add foam insulation board anywhere full frost depth couldn’t be reached.
- Crown the trench slightly to allow for settling, then restore topsoil, seed or sod, and any cut walks.
- Run a final camera pass through the new lateral.
That last recording is worth keeping. Store it with a sketch showing depths, materials and the locations of the curb stop and cleanouts. That small file answers most questions a future buyer, inspector or plumber will ask. It also means the next person to work on your property starts with a map instead of a guess.